Mon–Sat 7:00am–7:00pm · Same-day mindset · 24/7 emergency
San Antonio North Side
210-699-7159
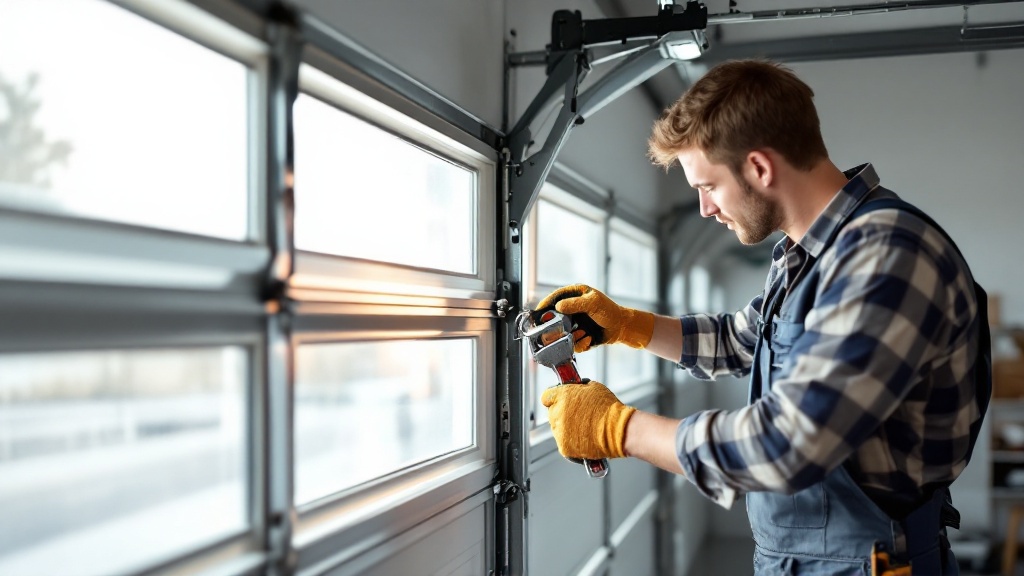
Learn what a garage door maintenance checklist covers, how often to run each task, safe DIY steps, and which repairs need a professional.
A well-timed garage door maintenance checklist is the difference between a five-minute adjustment and a Saturday morning spent staring at a door that won’t move. Your garage door is the largest moving object in most homes — a 150 to 400 pound assembly of steel, springs, rollers, and cable that cycles thousands of times a year. It also happens to be the entry point most families use more often than their front door. Working through a simple garage door maintenance checklist two or three times a year catches the small problems (a dry roller, a loose hinge, a misaligned sensor) while they are still small, and keeps the expensive problems — snapped springs, bent tracks, burned-out openers — from arriving unannounced. This guide walks through what the checklist actually contains, how to run it safely, what belongs to a professional, and what it realistically costs in time and money.
A garage door maintenance checklist is a repeatable set of visual inspections, hands-on tests, and light service tasks you perform on a schedule to keep the door balanced, quiet, and safe. It is not a repair procedure. It is a detection procedure — a structured way of noticing that something has drifted out of specification before it fails.
The checklist covers four systems that have to work together: the door panels and hardware, the spring and cable system that carries the weight, the track and roller system that guides travel, and the opener with its safety devices. Each has its own failure pattern and its own early warning signs.
Why it matters comes down to three practical outcomes. First, cost. A roller that costs a few dollars to replace during routine service can, if it seizes and jumps the track, bend a section of track and damage a panel. Second, safety. Torsion springs store an enormous amount of energy, and photo-eye sensors are the last line of defense between a closing door and a child, pet, or vehicle. Neither should be left unverified for years. Third, reliability. Doors almost never fail politely — they fail when the car is inside and you are late.
There is also a longevity argument. When homeowners ask how long does a garage door last, the honest answer is that the door panels themselves often reach 20 to 30 years, while the moving parts underneath — springs, rollers, cables, opener — have far shorter service lives measured in cycles rather than years. Maintenance does not extend the steel; it extends everything attached to it.
In practice, the routine follows a consistent sequence, and the sequence matters because each step tells you something that informs the next.
Step 1 — Watch and listen. Stand inside the garage with the door closed and run a full open-and-close cycle. Watch the door move. It should travel smoothly, at an even speed, without hesitating, shuddering, or pulling to one side. If your garage door is making loud noise — grinding, popping, scraping, or a rhythmic squeal — note where in the travel the noise occurs and whether it comes from the tracks, the top of the door, or the opener. Location is the diagnostic.
Step 2 — Disconnect and balance test. With the door fully closed, pull the emergency release cord to disconnect the opener. Lift the door manually to about waist height and let go. A properly balanced door will stay roughly in place. If it slams down or shoots up, the spring tension is off. Stop the checklist here and call a professional — an unbalanced door is a spring problem, not a homeowner problem.
Step 3 — Hardware inspection. With the door closed, work along the hinges, brackets, and roller carriers. Look for loose lag bolts, elongated screw holes, cracked hinges, and rust. Hand-tighten what is loose with a socket wrench; do not overtighten into sheet metal.
Step 4 — Track and roller check. Look down the length of both vertical tracks for dents, gaps at the joints, or debris. Check rollers for flat spots, chipped nylon, or worn stems.
Step 5 — Cable and spring visual. Look, do not touch. Cables should be tightly wound with no frayed strands. Torsion springs should be intact with no gap in the coil.
Step 6 — Lubrication. This is the single highest-value task in the whole routine.
Step 7 — Safety system test. Reconnect the opener. Test the photo-eye reversal by waving an object through the beam while the door closes. Test mechanical reversal by placing a solid object (a roll of paper towels works) flat on the floor in the door’s path — the door should contact it and immediately reverse.
Step 8 — Weather seal and finish. Check the bottom seal for cracking and the perimeter stop molding for gaps.
On how to lubricate a garage door correctly: use a garage-door-specific lithium or silicone spray, not a general-purpose penetrating oil like WD-40, which strips lubricant rather than replacing it. Apply a light coat to the hinge pivot points, the roller stems and bearings (not the nylon wheel face), the torsion spring coils, the bearing plates, and the opener’s screw or chain drive. Wipe the excess. Leave the tracks dry — tracks are a guide surface, not a bearing surface, and lubricant there collects grit and creates the exact grinding you were trying to eliminate.
A full garage door tune up performed by a technician follows the same logic but adds torque adjustment on the springs, cable re-tensioning, track realignment, force and travel-limit calibration on the opener, and replacement of worn components — the parts of the job that require specialized tools and carry real injury risk.
You do not need to guess whether your door needs attention. It tells you, usually for weeks before it fails.
| Need or scenario | What to check | Safe next step | When to get help |
|---|---|---|---|
| Garage door making loud noise | Where the noise occurs; rollers, hinges, opener drive | Clean debris, lubricate hinges/rollers/springs, tighten loose hardware | Noise persists after lubrication, or is a metallic bang/pop |
| Door feels heavy or drifts | Manual balance test with opener disconnected | Note the result and stop | Door will not hold position — spring tension issue |
| Door reverses on close | Photo-eye alignment, lens dirt, obstruction on floor | Clean and realign sensors; clear the track path | Reversal continues with clean, aligned, indicator-lit sensors |
| Slow or straining opener | Drive lubrication, door balance, travel limits | Lubricate drive; retest balance | Straining continues on a balanced door |
| Frayed cable or gapped spring | Visual only — do not touch | Stop using the door | Immediately; do not operate |
| Gaps around a closed door | Bottom seal, stop molding, door level | Replace bottom seal if cracked | Door sits visibly crooked when closed |

Group the work by how often it needs doing and by who should do it. That single distinction prevents most homeowner injuries and most wasted effort.
Never a DIY task, at any interval: adjusting or replacing torsion or extension springs, replacing lift cables, straightening bent track under load, or removing the bottom bracket. Those components hold the door’s stored energy, and releasing it uncontrolled causes serious injuries every year. The U.S. Consumer Product Safety Commission publishes ongoing guidance on garage door and opener hazards at cpsc.gov if you want to read the underlying safety background.
Spraying the tracks. The most common and most counterproductive mistake. Lubricated tracks attract dirt, which forms an abrasive paste, which is exactly what makes a garage door making loud noise get louder. Wipe tracks clean with a dry cloth instead.
Using the wrong product. Penetrating oils and general household sprays displace existing lubricant and evaporate. When learning how to lubricate a garage door, the product matters as much as the technique — white lithium grease or a silicone-based garage door lubricant, applied sparingly.
Turning up the opener force to fix a symptom. If the door is hard to lift, the springs are the problem. Increasing opener force masks it, overloads the motor, and defeats the safety reversal that depends on force sensing. It converts a spring repair into a spring and opener repair.
Treating a broken spring as a two-spring-door emergency only. On dual-spring systems, replacing only the failed spring leaves a mismatched pair with different remaining cycle life. Replacing both is standard practice for a reason.
Ignoring the balance test. Homeowners often skip it because it requires disconnecting the opener. It is the single most informative five seconds in the entire routine.
Skipping the safety tests because “it’s always worked.” Photo-eye sensors drift out of alignment gradually. Force settings shift as springs age. Both fail silently.
Deferring a garage door tune up to save money. A tune-up is priced as routine service. A spring failure at 2 a.m. is priced as an emergency call plus parts. The deferral rarely wins.
Guessing at lifespan. When people ask how long does a garage door last and get one number, it misleads. The answer depends on the component and the cycle count — a household that opens the door eight times daily wears out springs roughly twice as fast as one that opens it four times.
Call a professional when the balance test fails, when cables or springs show damage, when the door is off-track, when reversal tests fail after cleaning and alignment, or whenever the fix requires you to be under a door that is not fully secured.
| Option or approach | Best for | Watch-outs | Typical effort/cost range |
|---|---|---|---|
| DIY monthly safety check | Every household, no exceptions | Easy to skip; results are only useful if you act on them | 5 minutes, no cost |
| DIY seasonal lubrication and tightening | Homeowners comfortable with a socket wrench and ladder | Wrong lubricant or lubricated tracks makes things worse | 30–45 minutes, cost of a lubricant can |
| Annual professional garage door tune up | Doors in daily use, older systems, anyone wanting documented condition | Scope varies by provider — confirm what’s included in writing | A few hours of scheduling; routine service pricing |
| Reactive repair only | Rarely-used detached garages | Highest lifetime cost; failures land at inconvenient times | Unpredictable; emergency rates apply |
| Component replacement at end of cycle life | Springs at ~7–12 years, rollers at ~7–10 years, opener at ~10–15 | Requires knowing installation date and usage pattern | Planned parts cost, no emergency premium |
| Full door replacement | Cracked or rusted panels, structural damage, major efficiency upgrade | Long lead times on custom sizes and finishes | Largest investment; longest planning horizon |
For most homes the sensible combination is the first, second, and third rows together: a five-minute monthly safety check, a seasonal lubrication pass, and one professional tune-up a year. That layering catches nearly everything that a homeowner can catch, and hands off everything that requires torque measurement and specialized tools.
Time is the easy part. The monthly safety check is genuinely five minutes. The seasonal pass runs 30 to 45 minutes the first time and closer to 20 once you know your door. A professional tune-up appointment typically occupies a scheduling window rather than a full day.
Cost is harder to state honestly, because it moves with several factors and varies by market:
To avoid surprise charges, ask three things before booking: what specific tasks the tune-up includes, whether the visit fee applies toward any repair found, and whether parts pricing is quoted before work begins. A provider that answers all three clearly is giving you the information you need to compare on substance rather than on a headline number.
Escalate when any of the following is true:
Summit Garage Doors Inc works on residential and commercial doors across the full range of systems — torsion and extension springs, sectional and rolling doors, and the common opener drive types — which means a diagnostic visit usually ends with an explanation of the actual cause rather than a parts-swap guess. Service includes the balance, tension, alignment, and safety-calibration steps that a homeowner checklist deliberately leaves out, and quotes are provided before work begins so you can decide what to do with the information.
It is a scheduled, repeatable list of inspections and light service tasks — listening to a full cycle, testing balance and safety reversal, tightening hardware, inspecting rollers and cables, and lubricating moving parts — designed to catch wear early. It is a detection routine, not a repair procedure.
It applies to every powered or manual sectional garage door, regardless of age. It is more urgent if the door is used daily, is more than eight years old, has never had documented service, or has started making a new noise.
The safety systems and the balance test, in that order. Wave an object through the photo-eye beam during closing and confirm the door reverses. Then disconnect the opener and check whether the door holds position at waist height. Those two tests reveal the highest-risk problems in under two minutes.
Lubricating the tracks, using penetrating oil instead of a lithium or silicone garage door lubricant, increasing opener force to compensate for a heavy door, replacing only one spring on a dual-spring system, and attempting any spring or cable work yourself.
Every three to six months for most households, or seasonally in climates with large temperature swings. Doors that cycle more than six or eight times a day benefit from the shorter interval.
The panels commonly last 20 to 30 years. The moving components are shorter-lived and measured in cycles: springs typically 7 to 12 years, rollers 7 to 10 years, and openers 10 to 15 years under average residential use. Maintenance extends the components, not the steel.
You can do the inspection, cleaning, tightening, lubrication, and safety-testing portions. Spring torque adjustment, cable tensioning, track realignment under load, and opener force calibration require specialized tools and should be left to a technician.
So — when did you last watch your garage door go through a full cycle with the lights on and the radio off? If the answer is “I can’t remember,” or if anything in this checklist turned up a result you did not like, that is the moment to get a trained set of eyes on it rather than wait for the door to make the decision for you. Contact Summit Garage Doors Inc to schedule a garage door tune up or a diagnostic visit, and get a clear picture of what your door needs before it becomes urgent.
Need a second set of eyes on your garage door? Summit Garage Doors Inc can inspect the system, tune up moving parts, and quote any repair before the work starts.
Get a Free QuoteWe keep same-day openings when the board allows. Either way: diagnosis first, written price second, then the fix.